Axon Cladding Installation: Your Ultimate Aussie Guide to a Flawless Finish
Dreaming of a home exterior that marries stunning aesthetics with unmatched durability? In Australia, from the bustling streets of Sydney and Melbourne to the sun-drenched coasts of Perth and Brisbane, and the charming landscapes of Adelaide and Hobart, homeowners are increasingly turning to James Hardie Scyon Axon cladding to achieve just that. This premium fibre cement product offers a modern, vertical groove design that instantly elevates any property's curb appeal. But achieving that perfect look hinges on one critical factor: expert axon cladding installation.
This comprehensive guide dives deep into everything you need to know about axon cladding installation in an Australian context. We’ll cover the benefits of choosing this versatile material, the essential steps for a successful install, common pitfalls to avoid, and why entrusting your project to seasoned professionals is often the smartest choice. Whether you're a homeowner planning a renovation or a builder seeking to refine your techniques, get ready to transform your property with confidence.
What is Axon™ Cladding and Why Australians Love It?

Before we delve into the specifics of axon cladding installation, let's understand what makes this product a standout. James Hardie's Scyon Axon cladding is a high-performance fibre cement board renowned for its durability, design flexibility, and ease of maintenance. Unlike traditional timber weatherboards, Axon cladding resists rotting, warping, and swelling, making it ideal for Australia's diverse and often harsh climates.
Key Features & Benefits:
- Aesthetic Appeal: The signature vertical groove profile provides a contemporary, clean aesthetic. Available in various finishes, including the popular 133mm smooth texture, it offers a sophisticated look for modern and classic homes alike.
- Durability: Made from engineered fibre cement, Scyon Axon cladding is incredibly robust. It's resistant to damage from moisture, termites, and fire, adhering to stringent bushfire attack level (BAL) requirements, which is a significant advantage in many Australian regions.
- Low Maintenance: Once installed and painted, Axon cladding requires minimal upkeep, saving homeowners time and money in the long run.
- Speed of Installation: Designed for efficient fixing, Axon cladding can be gun-nailed to timber frames or screwed to light gauge steel frames, which contributes to faster project completion times. This makes axon cladding installation an attractive option for builders looking for efficiency.
- Versatility: Suitable for both external walling and internal feature walls, offering design continuity.
- Thermal Performance: When combined with appropriate insulation, Axon cladding can contribute to a more energy-efficient home.
From a product perspective, James Hardie Scyon Axon is typically supplied in large format panels, such as the common 2450mm x 1200mm x 9mm dimensions, allowing for broad coverage and fewer joints, which streamlines the axon cladding installation process.
Pre-Installation Checklist: Setting the Stage for Success

A successful axon cladding installation begins long before the first panel is lifted. Proper planning and preparation are paramount. Here’s what you need to consider:
1. Planning and Design
- Design Vision: Decide on the desired aesthetic. Will the vertical groove run true to form, or will you integrate it with other elements?
- Local Regulations: Always check with your local council in Sydney, Melbourne, Perth, Brisbane, Adelaide, or Hobart for specific building codes and approvals, especially concerning bushfire zones (BAL ratings) and structural requirements.
- Material Quantity: Accurately calculate the amount of Axon cladding panels needed, factoring in waste for cuts and errors. Remember to account for trims, battens for vertical joint timber details, and appropriate fasteners.
2. Sourcing Materials and Tools
Ensure you have all necessary materials and the right tools on hand for a smooth axon cladding installation:
- Axon Cladding: Obtain your James Hardie Scyon Axon panels, ensuring you have the correct profile (e.g., 133mm smooth) and thickness (e.g., 9mm).
- Fasteners: High-quality, corrosion-resistant screws or nails suitable for fibre cement and your frame type (timber or steel frames).
- Jointing Systems: James Hardie specific jointing accessories or timber battens for vertical joint applications.
- Sealants & Adhesives: High-quality, paintable exterior sealants.
- Sarking/Building Wrap: Essential for weatherproofing and a crucial part of the wall system.
- Cutting Tools: A fibre cement specific saw blade (circular saw with dust extraction is recommended to minimise airborne particles).
- Measuring & Marking Tools: Tape measure, level, chalk line, square.
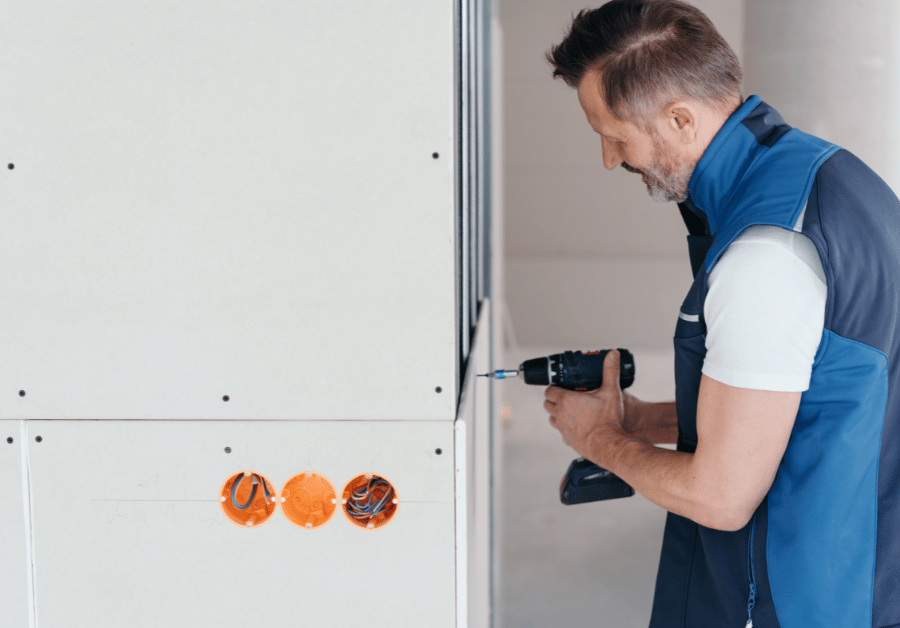
- Fixing Tools: Nail gun (for gun-nailing to timber) or drill/driver (for screwing to timber or steel).
- Safety Gear: Dust masks, safety glasses, gloves, ear protection – especially when cutting fibre cement.
- Finishing Products: Exterior-grade primer and paint.
3. Site Preparation
The structural integrity of your wall is key. Ensure your timber or light gauge steel frames are straight, plumb, and level. Any irregularities will be amplified once the large Axon panels are installed. Apply the sarking or building wrap correctly, ensuring overlaps and flashing are in place to manage moisture effectively.
The Axon Cladding Installation Process: A Step-by-Step Guide
Now, let's walk through the actual axon cladding installation process. While professional expertise is invaluable, understanding these steps will help you appreciate the work involved and ensure a quality outcome.
Step 1: Establishing Your Datum Line and Starting Point
The first panel sets the tone for the entire installation. Establish a perfectly level datum line around the base of your structure, typically 150mm above finished ground level. This ensures your first row of Axon cladding is perfectly horizontal. Depending on your design, you might start from a corner or a central point, working outwards.
Step 2: Cutting and Fixing Axon Panels
Axon cladding panels, like the 2450mm x 1200mm sheets, are large, so accurate cutting is vital. Use a fibre cement specific saw blade to achieve clean, crisp edges. Remember to wear appropriate safety gear to protect against dust. When cutting for openings like windows and doors, ensure precise measurements and straight lines.
Fixing the Panels:
- To Timber Frames: Scyon Axon cladding can be gun-nailed using approved nails (e.g., 50mm x 2.8mm flat head fibre cement nails) or screwed. Fasteners should be driven flush with the surface, not countersunk too deeply.
- To Light Gauge Steel Frames: Screwing is the preferred method, using self-drilling, self-tapping screws designed for steel. Again, ensure the screws are flush.
Maintain consistent spacing between panels and around openings as per James Hardie's installation guidelines. This allows for thermal movement and proper sealing. Pay close attention to the vertical groove alignment to maintain the desired aesthetic.
Step 3: Managing Joints and Corners
Joints are crucial for both aesthetics and weatherproofing. Axon cladding offers various jointing options:
- Vertical Joints: These can be covered with a vertical joint timber batten for a traditional look, or an express joint system for a minimalist finish. Ensure the joint is correctly sealed behind the batten or within the express joint detail.
- Internal Corners: Typically finished with a timber or aluminium angle, or by butting panels and sealing.
- External Corners: Can be finished with aluminium corner mouldings, or mitred joints for a clean, sharp edge (though this requires high precision).
Proper sealing of all joints and penetrations (e.g., around windows, doors, pipes) is non-negotiable for weather resistance and to prevent moisture ingress into the wall cavity. Use a high-quality, flexible sealant.
Step 4: Finishing Touches – Filling Screw Holes and Painting
This is where the transformation truly comes to life. After the axon cladding installation is complete and all panels are fixed:
- Fill Screw Holes: For a seamless finish, you'll need to fill screw holes in James Hardie fibre cement products. Use a suitable exterior-grade, flexible filler designed for fibre cement. Apply the filler, allow it to dry, and then sand smooth. Pay attention to any minor imperfections or holes in James Hardie boards that need addressing.
- Priming: Apply a high-quality, exterior-grade acrylic primer specifically recommended for fibre cement. This ensures excellent adhesion for your topcoats and helps seal the surface.
- Painting: Apply two topcoats of premium exterior acrylic paint. The smooth finish of Axon cladding is ideal for a crisp, modern paint job.
Common Challenges and How to Overcome Them in Axon Cladding Installation
While axon cladding installation is generally straightforward for experienced hands, certain challenges can arise:
| Challenge | Solution for Axon Cladding Installation |
|---|---|
| Uneven Wall Frames: Leads to wavy cladding. | Prioritise frame straightening before installation. Use packers or shims to create a level and plumb surface. This is critical for the vertical groove alignment. |
| Inaccurate Cuts: Wasted material, poor aesthetic. | Use a sharp, appropriate blade. Measure twice, cut once. Use a guide for straight cuts. |
| Improper Fastening: Panels loose, visible fasteners. | Use recommended fasteners for James Hardie products. Ensure they are flush, not over or under-driven. Practice on a scrap piece. Master how to fill screw holes in James Hardie products effectively. |
| Moisture Penetration: Due to poor sealing or flashing. | Strictly follow James Hardie's guidelines for sarking, flashing around openings, and sealing all joints and penetrations. This prevents water from getting behind the cladding. |
| Visible Screw Holes: Especially on smooth mm surfaces. | Use an exterior-grade, flexible filler. Apply thinly in layers, sand smooth, and prime before painting. This is key to achieving a truly flawless smooth finish. |
Axon™ Cladding vs. Other James Hardie Cladding Systems
While Axon cladding offers a distinctive vertical aesthetic, James Hardie provides other excellent cladding systems. Understanding their differences can help you make an informed choice:
- Matrix™ Cladding: Creates a bold, geometric look with recessed express joints, forming a grid pattern. Ideal for a contemporary, commercial-inspired aesthetic.
- Stria™ Cladding: Offers wide, horizontal boards with a deep shiplap joint, providing a sleek, modern linear look. It's a popular alternative to traditional weatherboards.
Each system has its unique aesthetic and specific installation nuances, but all share the durability and quality associated with James Hardie fibre cement products. Your choice will depend on your desired architectural texture and design.
Why Professional Axon Cladding Installation Matters in Australia
While some DIY enthusiasts might consider tackling axon cladding installation, the complexity and precision required often make professional assistance invaluable, particularly for larger projects or those in challenging environments like bushfire-prone areas. From our experience across countless projects in Sydney, Melbourne, Perth, Brisbane, Adelaide, and Hobart, we've seen firsthand the difference expert installation makes.
Benefits of Hiring Professionals:
- Expertise and Experience: Certified installers possess the in-depth knowledge of James Hardie products and Australian building codes. They understand the intricacies of working with fibre cement, ensuring correct fastening, precise cuts, and meticulous joint treatment. This expertise extends to knowing exactly how to fill screw holes for an unblemished finish.
- Efficiency and Speed: Professionals have the right tools, techniques, and team to complete the axon cladding installation efficiently, minimising disruption to your home life.
- Compliance and Safety: They ensure the installation adheres to all relevant Australian building standards, including bushfire attack level (BAL) requirements, and maintain a safe worksite.
- Warranty Protection: Many manufacturers' warranties on cladding products are contingent on correct installation by qualified professionals.
- Superior Finish: Achieving that perfectly seamless, aesthetically pleasing smooth finish with consistent vertical groove alignment requires a skilled hand and an eye for detail that only experience can provide.
- Problem Solving: Professionals are adept at identifying and resolving unexpected issues that may arise during the installation process, such as uneven frames or tricky architectural details.
Investing in professional axon cladding installation isn't just about getting the job done; it's about safeguarding your investment, ensuring longevity, and achieving the stunning aesthetic you envision for your home. It’s about peace of mind, knowing your cladding will stand up to Australia’s unique climate conditions.
Maintaining Your Axon™ Cladding
Once your axon cladding installation is complete and looking pristine, maintaining its beauty is incredibly simple. James Hardie fibre cement products are designed for low maintenance. Generally, a periodic wash with a garden hose to remove dust and dirt, or a soft brush with mild detergent for stubborn marks, is all that's required. Regularly inspect for any signs of wear or damage to the paintwork or sealant, and touch up as needed. With proper care, your Scyon Axon cladding will continue to enhance your home's appeal for decades.
Ready to Transform Your Home with Axon™ Cladding?
The beauty and durability of James Hardie Scyon Axon cladding are undeniable, offering a modern, low-maintenance solution for your home's exterior. However, achieving that perfect, long-lasting finish truly depends on meticulous axon cladding installation.
Don't leave your investment to chance. Whether you're in Sydney, Melbourne, Perth, Brisbane, Adelaide, or Hobart, finding experienced, reliable professionals for your axon cladding installation is crucial. At Get 3 Quote, we make it simple to connect with trusted local experts who understand the nuances of fibre cement cladding and can deliver a flawless result.